Table of Contents
- Why Crawlspace Mold Keeps Coming Back
- Safety First: PPE and Precautions Before You Enter
- DIY or Licensed Crawlspace Mold Removal: Where the Line Sits
- Step-by-Step Crawlspace Mold Removal Process
- Crawlspace Moisture Control That Actually Works
- Structural Damage, Monitoring, and Insurance Realities
- Licensed Mold Remediator Requirements in Florida
- What the Mold Remediation Quote Process Should Include
- Crawlspace Moisture Control That Actually Works
- Structural Damage, Monitoring, and Insurance Realities
- Frequently Asked Questions
Last Updated: September 13, 2026
Why Crawlspace Mold Keeps Coming Back
Crawlspace mold removal fails when the moisture that feeds the growth is never corrected. Mold needs a damp surface, organic material, and time (the EPA). A crawlspace supplies all three, which is why growth returns within months of a surface cleaning that ignores the water source.
The conditions that feed growth are predictable. Soil that stays damp, plumbing or roof leaks draining into the space, poor ventilation that traps humid air, and groundwater that pools after heavy rain all keep relative humidity elevated. When the dew point of incoming air sits above the temperature of cool joists and subfloor, condensation forms on the wood itself (DEW AND FROST DEVELOPMENT). That film of water is enough for spores to colonize.
At JLX Environmental, we evaluate the moisture conditions contributing to the problem before defining the mold-remediation scope.
Safety First: PPE and Precautions Before You Enter
The minimum protective setup for crawlspace work is a respirator rated N95 or higher, eye protection, gloves, and disposable coveralls (osha.gov). Disturbing mold growth releases airborne contaminants, and a crawlspace concentrates them in a small, poorly ventilated volume.
What most guides miss is the exit plan. Set up your lighting and tools before you crawl in, keep your path clear, and never enter alone. If the space has standing water, active sewage, or sagging structural members, stop and bring in a licensed professional rather than working around the hazard.
Treat every surface as contaminated until you have evaluated it. Cross-contamination happens fast when gloves, tools, and clothing touch clean areas on the way out.
DIY or Licensed Crawlspace Mold Removal: Where the Line Sits
Small, surface-level mildew on a few joists in a dry, accessible crawlspace is often manageable as a DIY project. More extensive growth, difficult access, affected porous materials, or conditions that are difficult to evaluate may warrant professional remediation.
Hand the job to a professional when growth covers a large area, when the wood is soft or crumbling, when the moisture source is unclear or ongoing, or when the space is too tight to work in safely. The same applies when the crawlspace serves a rental or commercial property, where documentation of the work matters.
A common mistake is judging severity by smell alone. Musty odor tells you something is damp, not how far the growth has spread behind insulation or under a vapor barrier.
Step-by-Step Crawlspace Mold Removal Process
A workable crawlspace mold removal process follows four stages: find the moisture source, contain the work area, remove the growth, and verify conditions afterward. Skipping any stage shortens the results. The detail that separates a job that holds from one that fails is in how each stage is executed on the actual materials in the space.
Step 1: Identify the Moisture Source First
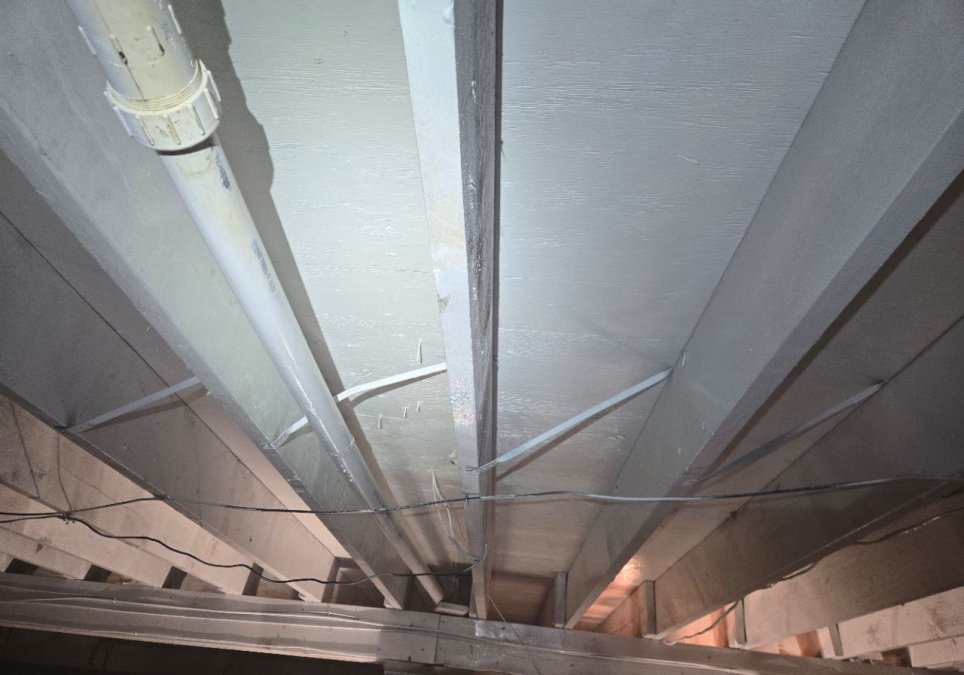
Trace the water before you touch the mold. Check the vapor barrier for tears, look for plumbing drips above the space, and note any groundwater staining on the soil or foundation walls. A hygrometer reading tells you whether the air itself is the problem. Until the source is corrected, remediation is temporary.
Separate the source into two categories, because they are handled by different trades:
- Intermittent sources, a supply line drip, a condensate line draining into the space, a roof leak tracking down a wall. These leave staining patterns that follow a path.
- Chronic sources, high water table, poor grading, soil that never dries, humid outdoor air condensing on cool joists. These leave broad, even staining and elevated humidity readings across the whole space.
JLX does not perform plumbing, roofing, leak repair, or repairs to correct the underlying moisture source. The source still has to be fixed for any remediation to hold, and that work falls to the appropriate trade.
Step 2: Set Up Containment and Ventilation
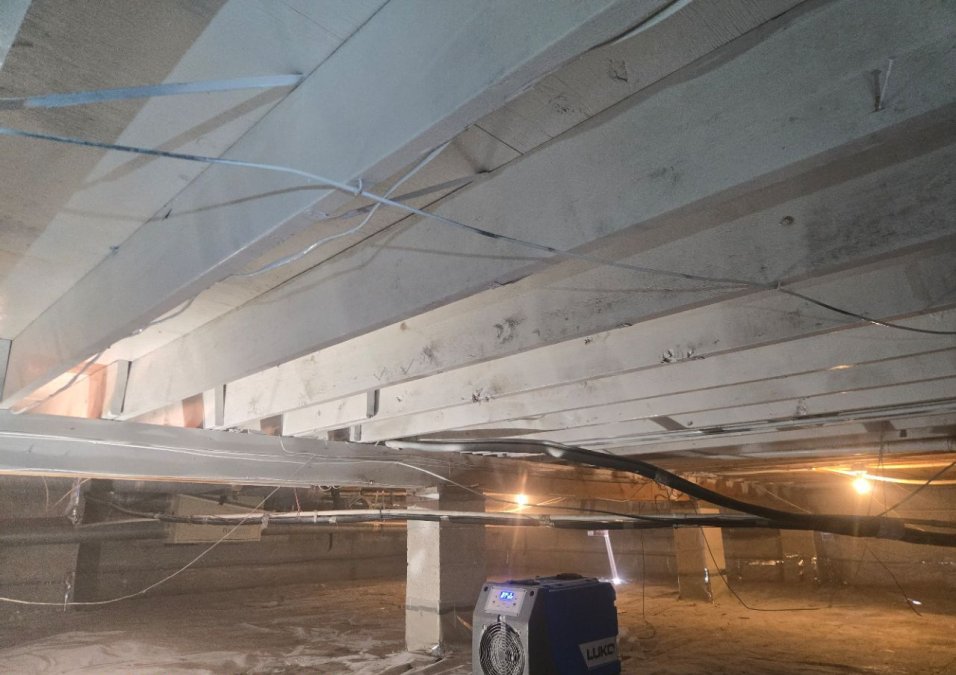
Seal the crawlspace access from the living space above, and use ventilation or an air scrubber to keep airborne contaminants from migrating. Containment protects the rest of the house while you work. Pay attention to the return-air path, if the crawlspace shares air with the living space through gaps, duct leaks, or an unsealed hatch, that path needs to be closed before work starts.
Step 3: Remove Growth and Clean Surfaces
How you clean depends on the material, and treating every surface the same is where DIY jobs go wrong:
- Solid wood framing (joists, beams, subfloor, rim boards), surface growth can typically be cleaned off. What matters is whether the wood underneath is still sound. Probe it with a screwdriver; if the tip sinks in easily or the wood crumbles, the problem is structural, not just cosmetic.
- Porous insulation, batt and blown insulation that has been affected typically comes out rather than getting cleaned. It cannot be reliably cleaned in place.
- Ductwork in the crawlspace, flex duct with growth on the exterior jacket is a different problem from growth inside the duct. Interior contamination is an air duct cleaning and sanitizing issue, not a surface wipe-down.
- Vapor barrier and soil, a barrier that has trapped moisture underneath may need to come up so the soil can be evaluated. Debris and organic material on the soil surface should be removed.
Work from the far end of the space back toward your entry point so you are not crawling through disturbed material. Bag debris at the point of removal rather than dragging it through clean areas.
Step 4: Verify Conditions and Plan Prevention
Once cleaning is complete, evaluate the space visually and by condition. In a crawlspace, that means looking at the framing, the barrier, the soil, and the humidity reading, not relying on smell. JLX does not perform air sampling or post-remediation air testing inside crawlspaces or attics, so verification in those spaces is limited to visual and condition-based evaluation. Where JLX performs post-remediation air testing as part of a remediation project, samples are submitted to a laboratory for analysis, and customers may choose an independent third-party verifier if they prefer. Laboratory results are one input used to evaluate conditions following remediation, not proof that a property is mold-free.
Crawlspace Moisture Control That Actually Works
Crawlspace moisture control comes down to three levers: keep water out, keep humid air from condensing on cool surfaces, and keep the space monitored so you catch a change early. Most guides cover the first two and stop. The third is what determines whether you find a problem in week two or year two.
Keep water out. A properly installed vapor barrier over the soil limits evaporation into the space. Where groundwater is the issue, drainage corrections and grading changes fall to the trades that handle them. JLX does not perform plumbing, roofing, leak repair, or repairs to correct the underlying moisture source, but the source still has to be fixed for any remediation to hold.
Keep humid air from condensing. Sealing and insulating ducts and addressing gaps between the crawlspace and the living area reduces humid air movement. The mechanism to understand is dew point: when incoming air is warmer and more humid than the cool joists and subfloor it contacts, condensation forms on the wood itself. That film of water is enough for spores to colonize. Venting a crawlspace in a humid climate can make this worse rather than better, because it pulls in more moist outdoor air.
Keep the space monitored. This is the part most homeowners skip, and it is the cheapest insurance against a repeat. A few tools make it practical:
- A hygrometer left in the crawlspace gives you a baseline relative humidity reading. Check it seasonally. A reading that creeps upward after summer storms tells you more than a visual inspection ever will.
- A remote or smart humidity sensor lets you check that reading from inside the house instead of crawling in. Some log history over time, which is useful for spotting a slow trend rather than a single spike.
- A moisture meter pressed against joists and subfloor tells you whether the wood itself is damp, which is a different question from whether the air is humid.
- A visual walk-through after major storms, checking the vapor barrier for tears, standing water, and new staining on the foundation walls.
A quarterly look at the vapor barrier, a hygrometer reading, and a check after major storms catch problems while they are still small. If a reading trends upward and stays there, that is the point to bring in a licensed remediator to evaluate conditions rather than waiting for visible growth.
Structural Damage, Monitoring, and Insurance Realities
Licensed Mold Remediator Requirements in Florida
Florida licenses mold remediators through the Department of Business and Professional Regulation, and a licensed remediator must carry the correct license for the scope of work performed. Homeowners can verify a license status directly through the state's licensing database before hiring.
Ask for the license number in writing and confirm it matches the company quoting the job. JLX is led by Florida Licensed Mold Remediator Devon Morante (MRSR4624). A license does not describe how a company works, so pair it with questions about scope, testing, and what the quote actually covers.
What the Mold Remediation Quote Process Should Include
A usable mold remediation quote states the scope of work in plain terms: what areas are affected, what gets removed versus cleaned, how containment is handled, and whether testing is included. Vague quotes that list a lump sum with no scope leave you comparing numbers that describe different jobs.
Ask each provider the same questions so the quotes line up:
- What areas will be treated, and how were they identified?
- What is removed, and what is cleaned in place?
- Is post-remediation testing included, and who analyzes the samples?
- What is excluded from the scope?
- Is the moisture source correction part of this quote, or separate?
JLX offers a Quote-Beat Guarantee: we will beat a comparable written mold-remediation quote from another Florida-licensed mold remediator by at least 10%. The word comparable does the work there. A quote for a smaller scope is not a lower price for the same job.
Crawlspace Moisture Control That Actually Works
Crawlspace moisture control comes down to three levers: keep water out, keep humid air from condensing on cool surfaces, and keep the space monitored so you catch a change early.
A properly installed vapor barrier over the soil limits evaporation into the space. Sealing and insulating ducts and addressing gaps between the crawlspace and the living area reduces humid air movement. Where groundwater is the issue, drainage corrections and grading changes fall to the trades that handle them; JLX does not perform plumbing, roofing, leak repair, or repairs to correct the underlying moisture source, but the source still has to be fixed for any remediation to hold.
A hygrometer left in the crawlspace gives you a baseline. Check it seasonally. A relative humidity reading that creeps upward after summer storms tells you more than a visual inspection ever will.
Structural Damage, Monitoring, and Insurance Realities
Long-term moisture damages wood, and the damage does not reverse when the mold is cleaned. Soft joists, delaminated subfloor, and crumbling rim boards are structural issues that a remediator can identify but not repair, since JLX does not perform reconstruction.
Monitoring is the gap most homeowners skip. A quarterly look at the vapor barrier, a hygrometer reading, and a check after major storms catch problems while they are still small.
Insurance coverage for crawlspace mold varies by policy and circumstances. Review your policy and speak with your insurer or adjuster about what your specific plan covers before assuming a claim will apply.
Problem | What to Check | Who Handles It |
|---|---|---|
Returning musty odor | Vapor barrier, humidity readings | Licensed remediator |
Soft or crumbling joists | Structural assessment | Licensed contractor |
Water entering the space | Grading, plumbing, drainage | Appropriate trade |
Post-work condition | Visual evaluation, lab analysis of air samples where applicable | Licensed remediator |
Crawlspace mold returns when the moisture underneath it never gets addressed, and that is the part most cleanup attempts skip. JLX Environmental evaluates the actual conditions, defines a scope that matches them, and performs licensed mold remediation, crawlspace treatment. If you have a written quote from another Florida-licensed mold remediator, our Quote-Beat Guarantee will beat a comparable one by at least 10%. Get your free quote from JLX Environmental and start with the moisture, not the spray bottle.
Frequently Asked Questions
What kills mold in a crawlspace?
No spray, fogger, or biocide solves crawlspace mold on its own. Cleaning products can remove surface growth from joists and subfloor, but mold returns when relative humidity stays high, water keeps entering, or ventilation is poor. The lasting solution is to address the specific moisture conditions contributing to the growth and then properly remediate the affected materials. Have the moisture source identified and addressed first, then treat the surfaces.
How much does crawlspace mold removal cost?
Pricing depends on the size of the crawlspace, how far the growth has spread, how much wood or insulation must be removed, and how difficult access is. There is no reliable flat rate. JLX Environmental provides a written quote after evaluating the space, and will beat a comparable written quote from another Florida-licensed mold remediator by at least 10 percent. Start with an on-site evaluation so the scope reflects your actual conditions rather than a phone guess.
Will homeowners insurance cover mold in a crawlspace?
Coverage varies by policy and circumstances, so there is no universal answer. Many policies treat mold as excluded or limited unless it results from a covered event, and long-term humidity or gradual leaks are often handled differently than sudden damage. Review your policy language and speak with your insurer or adjuster before assuming anything is covered. Keep documentation of what was found and the work performed, since that record supports whatever claim discussion follows.
What should I look for when hiring a licensed mold remediator?
Ask for the license number and verify it, confirm the company carries insurance, and request a written scope that names what will be removed, cleaned, and evaluated. A licensed mold remediator requirements checklist also includes a clear explanation of how the moisture source will be addressed, since remediation without moisture correction tends to fail. Be cautious of quotes given without an on-site look, and of anyone promising a property will never have mold again. Get the scope in writing before work begins.