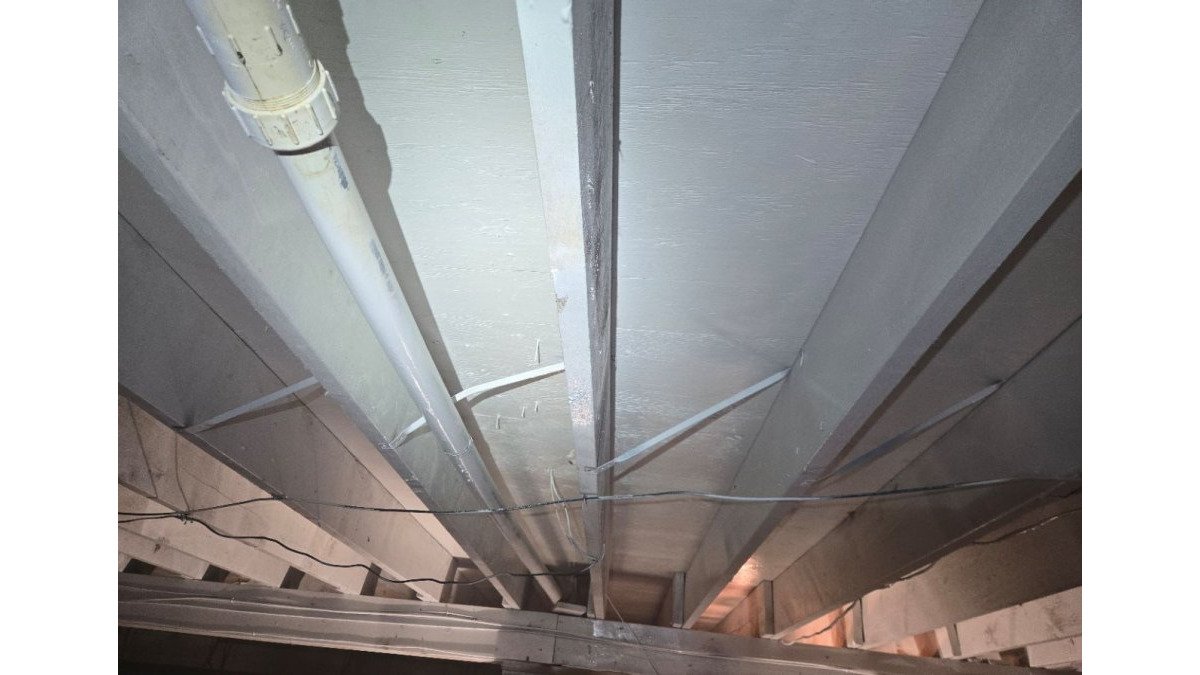
Last Updated: November 16, 2026
Quick Summary
Mold in crawlspace in Florida comes from moisture that never dries: humid outside air entering through foundation vents, ground moisture rising through soil, and trapped air with no escape. Warm, humid air condenses on cooler joists and ductwork, wetting the wood. The fix is controlling moisture, not just killing spores.
- Open foundation vents can admit warm, moist air that condenses once it cools inside.
- A musty odor near floor vents and the access hatch is usually the first sign.
- A vapor barrier should cover the entire floor and lap up the foundation walls.
- Sealing some vents while leaving others open can trap moisture rather than remove it.
- JLX does not perform air sampling or post-remediation air testing inside crawlspaces or attics.
Table of Contents
- What Causes Mold in a Crawlspace in Florida
- Signs of Mold in a Crawlspace
- How to Prevent Mold in a Crawlspace
- Crawlspace Mold Remediation: What the Process Involves
- DIY vs. Professional Thresholds: When to Call a Licensed Remediator
- Insurance and Liability: What Florida Homeowners Should Know
- Post-Remediation Maintenance and Long-Term Monitoring
- Getting a Crawlspace Mold Quote from JLX Environmental
- Frequently Asked Questions
What Causes Mold in a Crawlspace in Florida
Mold in crawlspace in Florida usually comes from one thing: moisture that never dries. Warm air, damp soil, and poor airflow create steady conditions where fungal growth takes hold.
Three forces drive most of it:
- Humid outside air that enters through vents and condenses on cool surfaces
- Ground moisture that moves up through soil and into the structure
- Trapped air with no path to escape, so dampness lingers for weeks
Humidity, Dew Point, and the Florida Climate
Florida's climate keeps crawlspaces wet in a way colder states rarely see. The dew point is the temperature at which air can no longer hold its moisture, so it condenses onto cooler surfaces (Dew Point vs Humidity).
That is why a crawlspace can feel dry at noon and be damp by night. Relative humidity that stays high over time is a common warning sign, though the exact level that matters depends on the space and materials.
Subterranean Moisture and Foundation Vents
Moisture also rises from below. Subterranean moisture moves through soil and foundation walls, and it often shows up as efflorescence, the white, chalky mineral deposits left behind when water evaporates from concrete or masonry.
Foundation vents are meant to let crawlspaces breathe, but in a humid climate they can do the opposite: open vents admit warm, moist air that condenses once it cools inside.
If you want the full breakdown of causes and the steps to address them, our guide on crawlspace mold removal walks through it in detail.
Signs of Mold in a Crawlspace
A common warning sign of possible crawlspace mold is a musty odor drifting into the living space. However, odors alone cannot confirm active mold growth or identify its location. A visual inspection and evaluation of moisture conditions can help determine whether mold remediation is necessary.
Here is how to check a crawlspace for mold:
- Smell the air near floor vents and the access hatch. A musty, earthy odor is the first clue.
- Look at the floor joists and subfloor for white, black, or greenish patches.
- Check the insulation for sagging, dark staining, or insulation saturation.
- Inspect wood for rot. Soft, crumbly wood means moisture has been there a while.
- Look for standing water or damp soil on the crawlspace floor.
- Test the humidity with a hygrometer before and after rain.
- Check for efflorescence on the foundation walls.
Wood rot and structural damage are the expensive outcomes. Mold itself is a symptom; the moisture behind it is the problem.
Here is what to check, and what each sign usually points to.
Sign | Where to look | What it suggests |
|---|---|---|
Musty, earthy odor | Near floor vents and access hatch | Active microbial growth somewhere below |
White, black, or greenish patches | Floor joists and subfloor | Visible fungal growth |
Sagging, dark staining, saturation | Insulation | Moisture reaching the insulation |
Soft, crumbly wood | Structural wood | Wood rot from prolonged moisture |
Standing water or damp soil | Crawlspace floor | Bulk water or ground moisture problem |
High humidity reading | Measured with a hygrometer | Air holding excess moisture |
White, chalky deposits | Foundation walls | Efflorescence, water moving through masonry |
How to Prevent Mold in a Crawlspace
Preventing mold in crawlspace in Florida comes down to controlling moisture, not killing spores. Spores are present in nearly every environment; the goal is to make the space inhospitable to fungal growth by removing the water that lets it colonize wood, insulation, and other organic materials.
Step 1: Get Bulk Water Away From the Foundation
Before anything inside the crawlspace is addressed, the water that reaches the foundation from outside needs a path away from the house. That means:
- Gutters and downspouts that are clear and discharge several feet from the foundation, not against the wall
- Grading that slopes away from the house so surface water does not pool at the stem wall
- Downspout extensions or splash blocks where discharge currently lands too close
A common pattern in older homes is a downspout that dumps directly at a corner, keeping the soil saturated against the foundation wall. That water finds its way in through capillary action and small cracks, and no amount of interior treatment will keep up with it.
Step 2: Block Ground Moisture With a Vapor Barrier
A vapor barrier, typically a heavy polyethylene sheet, is laid over the crawlspace floor to slow moisture movement from the soil into the air above. It is one of the highest-value fixes, because bare soil in a Florida crawlspace can release a steady supply of water vapor year-round.
What separates a working barrier from a wasted one:
- Coverage: the barrier should cover the entire floor and lap up the foundation walls, not stop short of the edges
- Seams and penetrations: overlapping seams and sealing around piers, pipes, and footings matter more than the thickness of the plastic
- Durability: a barrier that tears during future service visits loses effectiveness, so heavier material is often worth the difference
A barrier that covers 80% of the floor still leaves a large open soil area feeding humidity into the space.
Step 3: Decide Whether to Vent or Seal, and Be Consistent
The two broad approaches are:
- Vented crawlspace: relies on outside air movement to dry the space. Works better in dry climates; in humid ones it often needs additional dehumidification to be effective.
- Sealed or encapsulated crawlspace: closes the vents, covers the floor and walls, and treats the space as part of the conditioned building envelope. Crawlspace encapsulation goes further than a floor barrier by sealing the space and bringing it under more climate-controlled conditions.
Encapsulation is not right for every home and is not a cure-all, it works when the moisture sources feeding the space have been addressed and the assembly is detailed correctly.
Watch out: mixing approaches, sealing some vents while leaving others open, or installing a barrier without deciding how the space will be ventilated, can trap moisture rather than remove it.
Step 4: Manage Humidity Inside the Space
Once bulk water and ground moisture are handled, the remaining variable is the humidity in the air itself. A hygrometer gives you a real reading instead of a guess, and it is worth checking before and after rain to see how the space responds.
- Relative humidity that stays high over time in a crawlspace is a common warning sign, though the level that matters depends on the space and the materials.
- A dehumidifier sized for the volume of the space can pull humidity down when outside air or ground moisture keeps pushing it up.
- HVAC ducts and equipment in the crawlspace should be checked for leaks and condensation, since a sweating duct can wet the insulation around it.
Step 5: Keep the Systems Working
Prevention is not a one-time install. Gutters clog, barriers tear, dehumidifiers lose refrigerant, and grading settles.
The EPA's guidance on mold and moisture control reinforces the principle that controlling moisture is central to limiting mold growth.
If you want to understand how these prevention steps connect to active remediation, our mold remediation service page explains how the work is scoped.
Crawlspace Mold Remediation: What the Process Involves
Crawlspace mold remediation is the process of removing fungal growth, addressing the moisture that caused it, and verifying the work.
Depending on the scope and site conditions, remediation may involve:
- Containment where the scope and site conditions require it
- HEPA filtration where conditions call for it
- Removal or cleaning of affected materials, such as saturated insulation or compromised wood
For normal interior remediation, we perform post-remediation air testing after our work and submit samples to a laboratory for analysis.
To see how we approach the work, read about how JLX handles mold remediation or explore our crawlspace and attic treatment service.
DIY vs. Professional Thresholds: When to Call a Licensed Remediator
Minor surface growth on a small, accessible area is sometimes manageable on your own, depending on the material and moisture conditions.
Call a licensed remediator when:
- Growth covers porous materials like insulation, drywall, or soft wood
- The affected area is large or hard to reach
- There is standing water, active leaks, or long-term dampness
Do not try to create negative pressure with box fans or household fans to "push" air out of a crawlspace, as this can spread contamination into the rest of the home.
If you are weighing whether to hire out, our licensed mold remediation service explains what a proper scope of work looks like.
Insurance and Liability: What Florida Homeowners Should Know
Insurance coverage for crawlspace mold varies widely, and no one can promise a claim will be paid. Most policies treat mold differently from sudden water damage, and many set limits or exclusions.
A few practical points:
- Document everything with photos and dates before work begins
- Ask your insurer whether the cause is covered, not just the mold
- Keep records of the moisture source and any repairs
We do not give coverage advice. Coverage questions belong with your insurer. What we can do is explain what we find and define a clear scope of work so you know what you are dealing with.
Post-Remediation Maintenance and Long-Term Monitoring
Remediation is not the finish line. The crawlspace will drift back toward damp conditions if moisture control slips, and the forces that caused the original growth, humid air, ground moisture, trapped dampness, do not go away because the visible growth was removed.
A Seasonal Maintenance Calendar for Florida Crawlspaces
Florida's wet season (roughly June through September) and its drier winter months put very different loads on a crawlspace. A routine built around that cycle catches problems before they become remediation jobs.
Spring (before the wet season)
- Check the vapor barrier for tears, gaps, or sections that have pulled away from the foundation walls
- Clear gutters and downspouts and confirm discharge still lands well away from the foundation
- Test the dehumidifier if one is installed, run it and confirm it is pulling moisture
Summer (wet season)
- Check humidity monthly with a hygrometer, especially after multi-day rain events
- Inspect after storms for standing water, damp soil, or new staining on joists and insulation
- Watch for the musty odor returning near floor vents or the access hatch, it is the earliest practical signal that conditions have shifted
Fall (transition out of the wet season)
- Re-inspect the barrier and insulation for sagging, dark staining, or insulation saturation that built up over the summer
- Check wood for rot, soft or crumbly wood means moisture has been present long enough to affect the structure
- Clear any debris that has collected against the foundation or under the crawlspace
Winter (drier months)
- Service the dehumidifier if one is installed, following the manufacturer's schedule
- Re-inspect after any plumbing or roof work, since a slow leak can go unnoticed in a dry season
- Confirm grading still slopes away from the house after a season of settling
What to Watch For After Remediation
After remediation, the crawlspace should be evaluated on conditions, not on a single reading. The things worth tracking are the same ones that signaled the original problem:
- Returning musty odor near floor vents or the access hatch
- New visible growth on joists, subfloor, or insulation
- Rising humidity on the hygrometer compared to your baseline
Why Verification in a Crawlspace Is Visual
In crawlspaces and attics, JLX does not perform air sampling, and verification of remediation work is visual and condition-based, based on a direct look at the materials, moisture conditions, and the barrier.
The CDC's page on mold cleanup and prevention reinforces the general idea that controlling moisture is central to preventing mold.
If you are seeing signs that the problem is coming back, our licensed mold remediation service explains how a re-evaluation is scoped.
Getting a Crawlspace Mold Quote from JLX Environmental
A written quote should tell you what was found, what will be done, and why.
JLX Environmental is a local, family-owned environmental services company led by Florida Licensed Mold Remediator Devon Morante (MRSR4624).
If you are ready to move forward, tell us what's going on and request a free written quote.
Crawlspace mold does not fix itself, and it rarely stays put.
Frequently Asked Questions
How serious is mold in a crawlspace?
Crawlspace mold often indicates prolonged moisture exposure, which can also lead to wood rot and structural deterioration of floor joists and subfloor materials. Surface mold itself does not necessarily compromise the structural integrity of the wood. It also affects indoor air quality because the crawlspace is connected to the living space above through gaps and the HVAC system. The severity depends on the extent of growth, the materials affected, and whether the moisture source has been addressed. Visible mold on porous materials or widespread growth typically calls for professional evaluation rather than surface cleaning.
Will insurance cover mold in a crawlspace?
Coverage varies by policy and by the cause of the moisture. Many homeowners policies exclude mold unless it results from a covered peril such as a sudden pipe burst, and long-term humidity or poor ventilation issues are commonly excluded. Review your policy language and speak directly with your insurer or adjuster about your specific situation. JLX Environmental can provide a written scope of work and quote, but coverage decisions rest with your insurance carrier.
What causes mold in a crawlspace?
The main driver is sustained moisture. In Florida, high relative humidity, warm air entering through foundation vents, subterranean moisture rising through the soil, and plumbing or roof leaks all contribute. When the dew point is reached on cool surfaces like floor joists, condensation forms and creates conditions where fungal growth can establish. Poor drainage, missing or damaged vapor barriers, and insulation saturation make the problem worse.
How long does crawlspace mold remediation take?
Timelines depend on the square footage, the extent of growth, the materials affected, and site conditions. Timelines vary with the size and condition of the crawlspace and the work involved. JLX Environmental defines the scope after an on-site evaluation and provides a written quote before work begins so you know what to expect.
